Search This Blog

Tuesday, April 1, 2014

Vintage Quilt Show and my Urban Cowgirl Quilt. My OTHER Urban Cowgirl Quilt....

 
I went to a vintage quilt show last weekend. some of them were really neat. but there was one fun surprise.
I was amazed by the Queen Sized hexie quilt. It looked like this one. The Hexie's were one inch. Literally. ONE. INCH! Wow.
(picture borrowed from here caused I didn't take one. augh!)

There was also a very fragile yo-yo quilt in a glass case. So neat. Partly because it was obviously about queen sized.
(again, borrowed a picture! from this gal who took the quilt out of it's glass case when she saw it. I wonder if it was the same quilt?)

Loved this one!

I also really love Dresden plates. and the hand quilting.

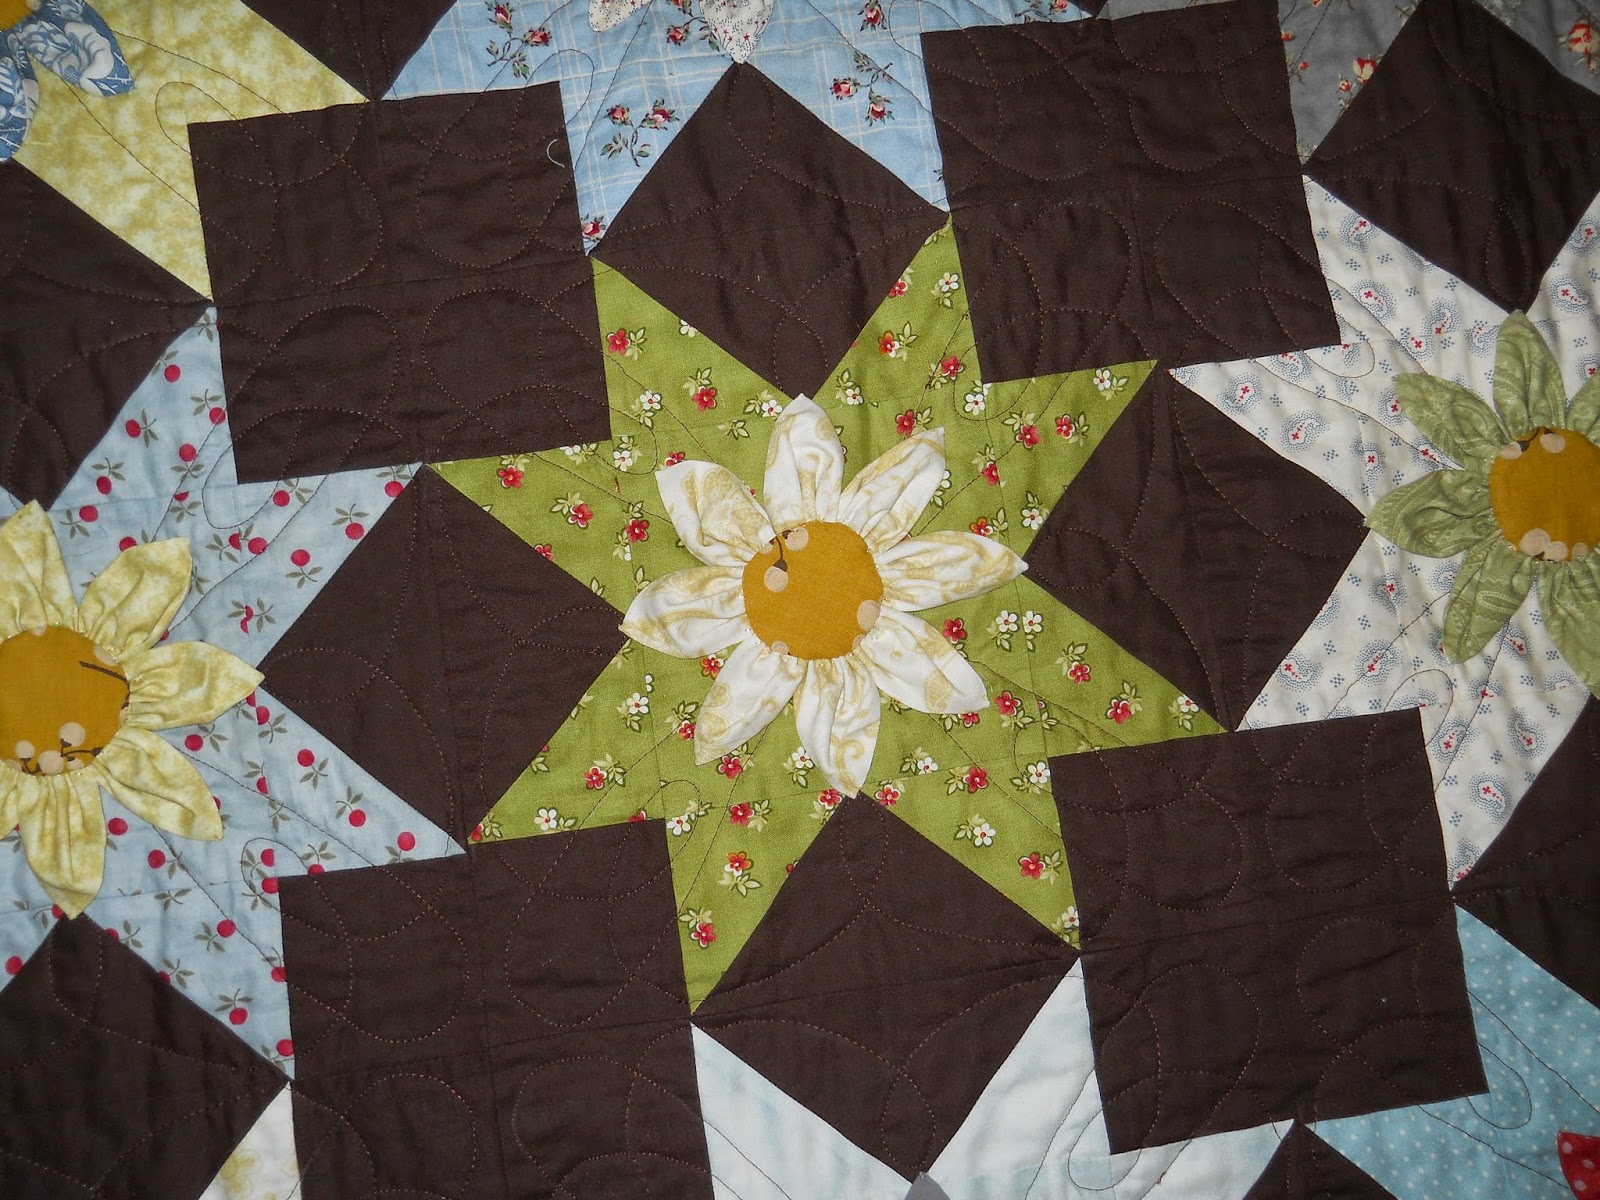
But the fun surprise was seeing this one! I am working on that Urban Cowgirl pattern by Urban Chiks for my daughter to take to college. I was so surprised to see that that pattern must have originally been taken from this old pattern - Star Dahlia! My daughter and I so enjoyed seeing the original way of doing this quilt!

The new pattern is very 3D. This one has the flower petals actually pieced into the star. The circle is also pieced into the center so that the whole thing is only one layer - very flat. Looks like it was rather difficult to do.
 
 
Here is one of the Urban Cowgirl quilts I've done. You can see the daises here are 3D.
 Here are some pretty squares!!


there's the polka dots!


Here's the machine quilting.

The border quilted. And I added some felt to the centers so that the centers are puffy.


Saturday, March 22, 2014

Two Charm Pack Tutorial /Pattern

What can you do with 2 charm packs? Here's an easy idea that would be good for beginners! Here's a general overview. Maybe sometime I'll put a detailed pattern in the etsy shop. :o)

Sew a 5"  X  1 3/4" white or off white strip (sashing) to each of  60  5" charm squares.
I used 70 / 72 sq.s so I could use more of the fabrics, but it caused me to have a quarter square in two corners. You'll see below.
 
Press all the squares open and lay them out in Rows on the floor or table to see where they look best. you should have enough squares to use them on the edges and just cut them off a quarter inch past the points. (I didn't have enough squares to do that, so I cut some of my squares in half into triangles for the edges. It worked just fine even though technically there wasn't an extra quarter inch for the seam.) Sew those squares and their sashings together in these Rows.

Then sew the same width sashing in long strips along the side of each row. Then you can sew the rows together. Try to make sure that your squares stay lined up with each other so they're straight in both directions. Use pins if you need too on long rows like that. You'll notice I have a quarter triangle on this corner (above). I added an extra row to my original plan which forced me to do that. It would be better to do both corners like the one below!
 
On two corners you'll have the sashing end like this.^  The problem is, it doesn't extend to a square corner. I just took a sashing scrap and sewed it on to the corner. It looks like it's too wide here, but it won't matter.

Then take your ruler and trim like this. ^
OR you could unpick the whole corner (above) and put a new sashing piece in - an inch longer than the first one was.

Put a 2 1/4" border on (same fabric as sashing). Then a 1 3/4" Inner border. And an Outside border however wide you want.
Ta-da!!
These always look great no matter what line you use!
Have fun!


Thursday, March 20, 2014

Urban Cowgirl by Urban Chiks for moda

                    Here is a great idea for 2 charm packs. Simple squares on the diagonal, but looks great.
                                                                  See the tutorial here.

I like the single squiggly line quilted down the sashing. ;o)
You can sorta see it in the upper right area.

Love the fabrics in this line!


I did my first feathered border on this quilt! I started with light thread but switched to dark so you could see it better.

Here's one example of  how I use rit dye on the fabrics in my quilts. See the narrow inner border there? that's the original color. It matches the lighter blue in the quilt nicely. But, I thought the darker blue in the line was a more pleasing color, so i dyed the backing with some navy blue rit dye. It changed it so it's closer to the dk. blue. 

Here's how i quilted the squares. You can see it better on the back. What would you call that? double tear drop machine quilting?

a better view of the machine quilted feather border.


Monday, March 10, 2014

Annie Basket Quilt with Lakehouse Fabrics!

Lots of Polka Dots in this one. 
 
I just looove.. this Annie Basket quilt. I only did half of it to hang in the store here, but it was so much fun!
I wasn't sure about it at first because it seemed kind of a cheat... the baskets and bases and sashing are all printed on there for you. All you do is put the applique on. I sorta wanted to have the satisfaction of making my own baskets. But, this is by far more economical, so went for it and I'm so glad I did!
 
 
Here is one of the panels. There are two in this set. I like how she gave us some fabric scraps on the side to work with. :o) This line was just the living end! ...the roses, the polka dots...delightful!
What I didn't like was that you have buy the gingham (shown below) to re-sash the top and bottom. The first time this was cut for me, I got home and realized that she hadn't left me a quarter inch to attach the exact same fabric back on. I didn't blame her, it was impossible to know where to cut it. I had to go back and get a new panel cause the first one was ruined. It would have been so much better if they had given you the full plaid strip plus a quarter inch like they did on the sides of the panel. Or at the Very Least, a dotted line for the clerks to know that they have to cut down the middle of the sashing.
 
It was so so fun to pick some cute fabrics for the applique!

I used matching colored thread to do a nice big blanket stitch around each piece.

This is probably my favorite block. I love all these fabrics as strawberries! and the ric rac under the leaf!? ...to die for.

I quilted exactly around each basket and handle so it fools you a little bit into thinking it was pieced on there.

 
Polka dot Cherries! Plaid handle!
 
Here's how I quilted Annie Basket Quilt on my home machine - with loops in straw colored thread.

I love to quilt squares around the borders with and X. You do that in a zig zag all the way around rather than one X at a time so that you're not stopping and tying off constantly. but you probably knew that....


Wednesday, February 26, 2014

Hexagon Tutorial / Pattern with no Y seams/ Vintage fabrics

I just love a good hexie quilt don't you? But I really don't like difficult Y seams. Here's how I did this hexagon quilt with no Y seams. I'll try to show another arrangement below.
 
Sew two or three strips together like you see here. These strips are 2 1/4" wide.  2 1/2" works if you're only using two strips. (it's possible it could work for 3, not sure)                                                                               
 
Use a 60 degree ruler to cut triangles across the strip. Make sure the point is exactly one edge of the fabric. You can see I put a sticky note on the ruler approximately where the bottom of the strip should be. (you can see in this picture, the tip of this ruler is flat, so I had to lower the ruler 1/4" from the edge of the fabric and just pretend it continued to a point.)
 
How to use a regular quilting ruler to cut 60 degree angles. The ruler needs to have a 60* line on it. Just line up the 60* line with the edge of the fabric and keep turning the ruler back and forth from top to bottom making sure you're meeting right at the tip of the triangle on each cut.
 
When you're done, you should have six of each triangle in reverse of each other! How cool is that?
 
Sew three pieces together so they're in half. You can see in the green one here how only half of it is sewn together. They look so cute! it's so exciting to see them
 come together!
                                         

During the process, I discovered that sometimes I had a little problem. ....Not quite enough fabric for the last triangle. See how I run into the selvage edge?
 
So, I decided to stagger the fabrics about 3/4", so I didn't have to worry about running out of fabric at the end.
It works well.
 
Here's another way you can arrange the triangles...Love!
 
Then lay the hexie halves on a sheet or something and arrange them in a pleasing way. When it's on a sheet, you can roll it up and sew hexie halves together later at your leisure.
The lines here show the rows.
Sew halves together like this:
 
 
Then you'll attach the rows together lining up the corners / seams as you go.
 
I haven't figured out how the binding is going to go yet! wish me luck!
 

Thursday, February 20, 2014

PB&J Quilt with Fireworks Pattern

I finished my PB&J Quilt! Isn't that a great name for a fabric line? 
I used the Fireworks pattern by Thimble Blossoms.
This is one of the very few quilts I've made that does NOT have Polka Dots!


I decided to use some grunge white and gray for the background.

Love the red chevron!

This is a cute block too.


Here's a close up of the machine quilting i did on my home machine. 
I tried a swirl and hook design.

The large navy and turquoise chevron is from another fabric line.
I think it fits quite well! I had to "tea dye" the fabric to get it from light blue to turquoise though.