Search This Blog

Wednesday, November 18, 2015

"Flower Girl" by Thimbleblossoms Quilt with a stem!

 
Finished the Flower Girl quilt that I made with Cathy and Brittany.
It's a Thimbleblossoms pattern but we added a stem.
 
We started with these fabrics...
 
and added some reds and bright pinks...
 
Almost went with the large brown dots. I still like this....a lot.
so hard to decide.


Agonized over it...red or brown....maybe both?
NO. 
 
 
Echo quilting around the stem.


there's the polka dots...


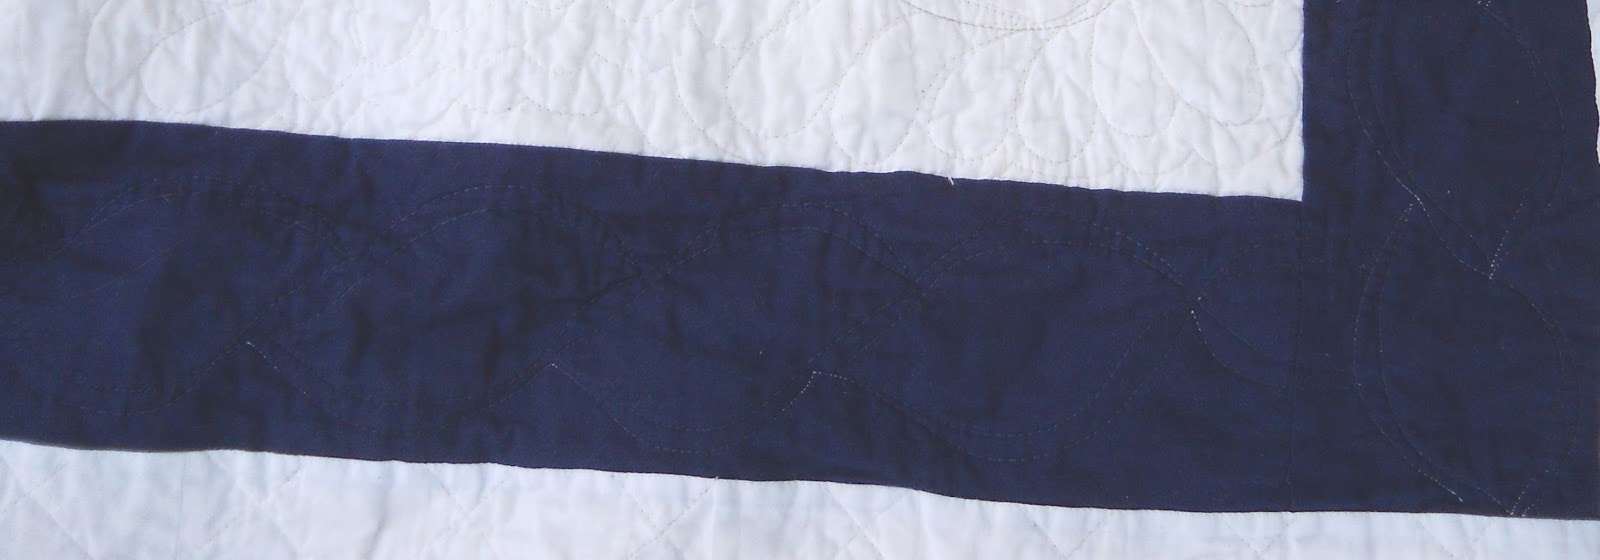
 I thought this was a cute way to machine quilt the flowers in "Flower Girl"
 
You can see it best on the white...


Pretty!

Monday, October 26, 2015

Sewing Machine Bag

I made a bag to hold my sewing machine when I travel to sew.
 
 
It's out of "Social Club" fabric by Moda
the cherries are "Avant Garden"
 
the flower is out of jumbo ric rac 

 
I just appliqued the baskets on. Way easier than piecing.

Double pocket on this side.. 
 
full size pocket on this side to hold rulers. I put some card board in there to protect them.
 
pockets on the sides to hold lunch and water!
 
 
I even put a pocket behind one of the baskets on the outside. 

Farm Girl Canning Season

 
Finished my Farm Girl Canning Jars!


Here, you can see the zig zag fabric on the lids and the shelf and 'polka dot' background fabrics.
 
Canning Season Pattern by Bee in my Bonnet, Lori Holt


Tuesday, August 25, 2015

Liberated Baskets

Making liberated baskets!
 
Here's a rough tutorial..
Make all your background squares the same height, but different widths. some skinny, some wide.
This one is 12 1/2" tall by 9" wide.
Cut in half at varying measurements.
This one happens to be at 6 1/4"
 
Cut a basket piece the same height as the bottom piece of background. 6 1/4" in this case.
 
Lay the basket square on top of the background. Cut the sides of the basket AND the background together at the same time at whatever wonky angle is pleasing to you.  That way they will line up for sewing. Here one side is cut and the extra piece of basket removed.
 
 
Cut the second side.


Discard the middle piece of background (that was under the basket) Then sew the basket and two sides together.
 
Use wonder under or your favorite applique method to applique the handles on the top half of the background. I used a straight stitch on my handles. Then sew the top and bottom together.
 
Wha-La! Lots of baskets....
 
some favorite baskets...


this one got a two colored handle...
 
You should be able to see the cute home machine quilting on this one.
 
Liberated Basket Quilt!


Monday, August 17, 2015

Rose and Vine Wedding Quilt in Pink and Navy

 
 We recently had a son get married! I can finally put up some pictures of their wedding quilt since they've seen it now. It was fashioned after one of my Grandmother's antique quilts. See that here. I've been wondering if blending the vintage rose quilt pattern and the navy modern lines really worked, but we've decided it's symbolic of weaving together the older generation and the new. :o)
 
First, the vines. I cut about 1" wide strips, folded them in half and twisted them.
 
Hand stitched the large flowers on.
 
wonder under for the leaves and other flowers.
 
some detail on the leaves! 

  
I love the navy ribbons, the vines, and the cross hatch machine quilting.
 
The six main pink roses are stitched down by hand. The rest are stitched by machine.

 
I did the quilting all on my juki TL-2000 home machine.
I attempted some feathering...
 
another view of the center and the cross hatch machine quilting.
 
cross hatching around the outside too. 
 
twisty vine around the inner border.
 
Feathering on the outside border.


Saturday, July 4, 2015

Farmhouse Blocks

Having so much fun making "Farm Girl Vintage" Farmhouse blocks!
 
 
and from mostly Walmart fabrics!
 
That's right, I said "Walmart!"
 
could you just die?
Can't wait to do the next one....

Saturday, June 27, 2015

Embroidered Pin Cushion!

I found this book recently. "Patchwork Loves Embroidery"
so many super cute things in it!
 

I immediately made a pin cushion. I do love a cute hand embroidered pin cushion!
How long does it take to do the embroidery? Only about two hours. Not bad at all.